

HOW TO DRILL YOUR ALUMINIUM DOOR FOR A MORTICE LOCK
Drilling your aluminium door for a lock is easier than you might expect. With just a few tools you can have your door ready to install that new lock in minutes.
Your front door lock should come with a template giving you the dimensions of the spindle (handle) hole, cylinder (euro) hole and mortice.
Gather your equipment.
Using the most common locks as a reference (Windsor 1184 or Optimum 2 point), here is a list of the tools that will make the job easy.
- Tape measure and a ruler
- Pen
- Masking tape
- Hole-saws to match the hole sizes. (20mm for this example)
- Drill bit to match the hole-saw mandrill. (Usually 6mm)
- 3.2mm drill bit for the mortice plate fixing screws
- #1 square drive
- Battery Drill
- Router
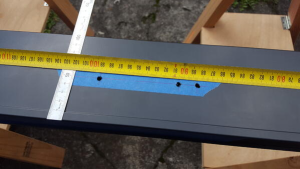
1) Marking the door face for drilling.
Decide the height you wish to mount the lock. The standard height for most locks is 990mm from the bottom edge of the door to the handle centre. Using your supplied template as a guide, put masking tape strips where you plan to drill the holes. Measure from the bottom of the door 990mm up and make a pencil mark for the handle. From that mark, measure down and mark 85mm & 103mm for the cylinder (euro).
Depending on the back set of the lock you purchased you’ll need to measure and mark from the edge of the door to the handle & cylinder line. Windsor 1184 will be 60mm and Optimum will usually be either 30mm, 40mm or 50mm back set. These dimensions will be stated on the drilling template supplied.
2) Drilling the holes.
Load the battery drill with the 6mm bit and drill holes at the three marks you just made. If your drill bit is long enough you can drill right through the other side being careful to keep the drill at 90o to the door face.
Next load the 20mm hole saw and drill the three holes. The two holes for the cylinder will overlap and care should be taken with a firm and stable grip to avoid “grabbing”.
If you have a router, lightly machine off the high spots to make an elongated 20mm hole for the cylinder. Otherwise a file will do it with some extra work. Repeat on the other side of the door.

3) Cutting the mortice.
Put masking tape on the edge of the stile where the mortice is to be cut. Referring to the template dimensions, mark out the mortice profile. If you have a router, drill a starting hole inside the profile large enough to fit a small router bit. Carefully follow the inside edge until the profile is complete. Without a router, drill a series of holes close together around the inside of the profile. A sharp chisel or side cutters can be used to cut the web between the holes. Finish the mortice with a router or a file. Some aluminium doors are constructed using a “honeycomb” material which will need to be cleared to allow the lock body to fit. This is soft enough to be easily removed using a chisel.

4) Fitting the lock.
Insert the lock body into the mortice in the correct orientation. Drill through the mounting holes in the mortice plate with a 3.2mm drill. Fasten the lock with the self-tapping countersunk screws provided in the lock kit. There are many options of escutcheon and hardware that can be fitted to the face of the door stile.

You can now stand back and admire your handy work. There’s greater satisfaction when you’ve done it yourself.